We just rolled out an update to the interface of our editor. You might notice some new features (hello long awaited light-settings!) but the most visible of this update are that some of our tools have moved to a different place in the interface. We think and hope these changes will make it even easier to create and manage your floorplans.
The main change is that in the old interface, there were three main tabs. We have expanded this to five tabs but also made some adjustments in the functions within these tabs. These tabs are the five steps to create your floor plan, and can be used from left to right to give you a more structured process.
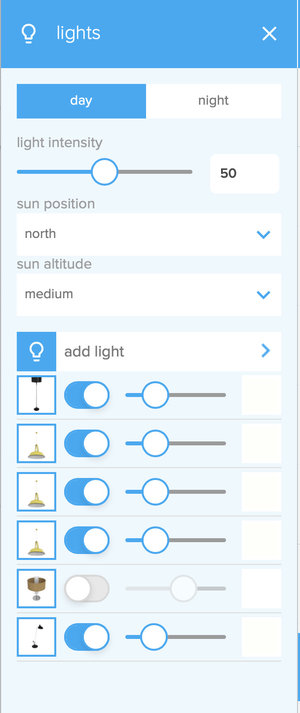
The first tab (with the house icon) allows you to have an overview of all the project settings. This tab might still look a bit empty but in the coming period there will be more functions added. The first button allows you to close your project and go back to your dashboard. We also added a new function ’light settings' . With this tool you can adjust the sun position, height and intensity, and also immediately place lamps and adjust their intensity. This will give you more control on how the renders of your plans will look like.
The second tab (with the floor icon) contains the floor menu. Here you can add or edit floors. To give you a better overview, we have added a thumbnail preview of all your created floors. We also improved the “restore” functionality so it is now much quicker to restore one of your previous saved plans.
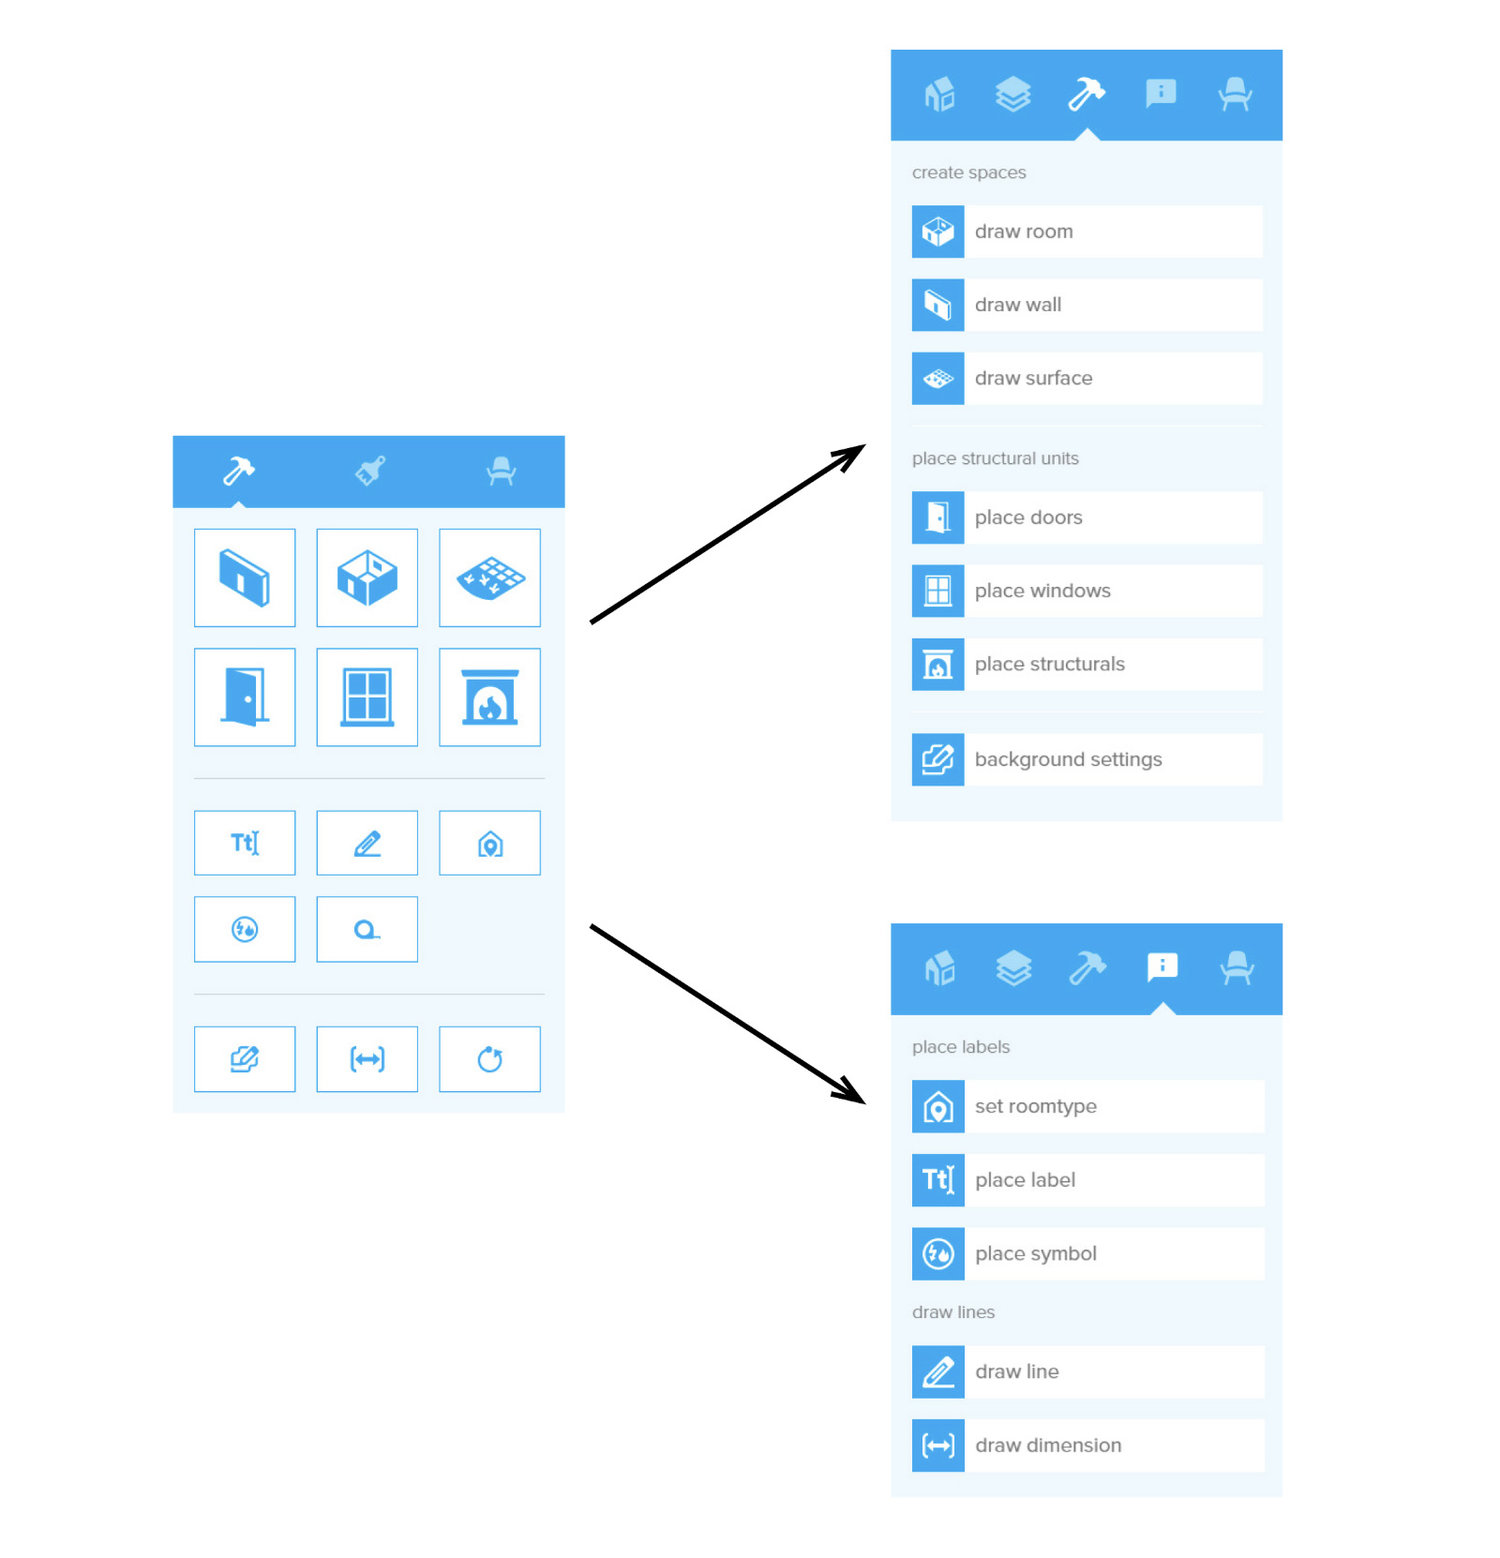
Now that you have created your floors, it is time to build and the third tab (the hammer icon) has the tools to make the actual structure of your plan. This tab has two sub-functions: 'create spaces' and 'place structural units'. Here you can draw your rooms, walls and surfaces, and place doors, windows and structural elements like stairs and fireplaces. You can also add a background to your floor plan, if you already have an underlay of your floor plan.
These functions used to be part of the construction tab, which has now been split up into two tabs. The placing labels and drawing lines functions (which also used to be under the construction tab) can now be found in the fourth tab (the i). This tab allows you to add information to your floor plan, so here you can set roomtypes, place labels and symbols, and also draw lines and dimensions.
The decorating and furniture tabs have now been combined to one tab, which is the fifth tab (the chair). This tab contains the paint, materials and furniture functions.
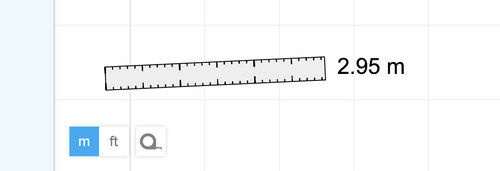
You now also have quicker access to the Metric to Imperial switch and the tape measure functionality via the mini icons in the bottom left of your plan. We also have added titles to our icons, so that you can immediately see what they stand for.
Hopefully all these changes will improve your experience using Floorplanner!